MUSEUM
Antique Rosaries
HISTORY
of the Rosary
PRAYERS
for you index
ROSARIES
cord instructions
 SEE MORE
LINKS
EMAIL US+
877.695.3561


 *HOW to MAKE a ROSARY*
(STRUNG + CHAINED + KNOTTED)
Traditionally prayer counters have been made three
basic ways over the centuries.

CLOSEUP OF ENDERS

 #F (forming crimp bead)
CLOSEUP OF SPACERS

 #B (decade ave beads)
  STRUNG  +  CHAINED  +  KNOTTED
Traditionally prayer counters have been made three basic ways over the centuries.  Records tell us that the knotted cord were probably the earliest with strung rosaries and chain rosaries following.  Each serve their purpose very well today.  How a rosary is made may depend on several things: materials available and/or how they will be used or distributed. So to say one method is better than the other is not an issue here.

MAKING ROSARIES FOR LOVED ONES
Most important is to make and distribute them to others, love ones or for our own prayers!  It is as simple as that. The rosary is a powerful prayer weapon against evil as it tells the story of the Life of Jesus by his mother, Mary. The instructions below are for the standard 5 decade rosary and may be configured as needed for your choice of devotional chaplets or other prayer needs.

SAMPLE ROSARY NOT FOR SALE
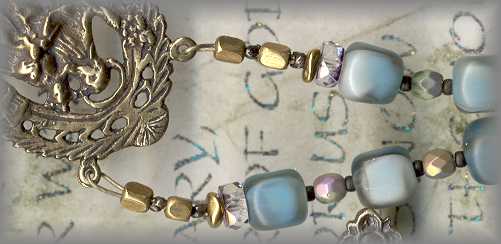
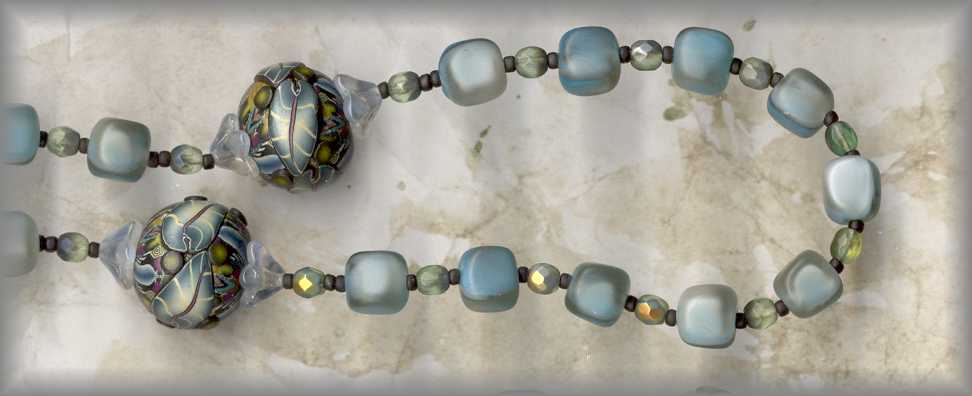
Thank you for asking but we only found enough blue antique beads to make one rosary (shown) and unable to find any more. this rosary is in a private collection and is not for sale. Pater beads are by Klew Expressions (Karen Lewis, California Bead Artist) 

 CONFIGURATION OF 5 DECADE ROSARY   -   STRUNG ROSARIES   -   CHAIN ROSARIES
 MAGAZINE ARTICLE   -  KNOTTED CORD ROSARIES
PRINTABLE INSTRUCTIONS


*CONFIGURATION*

5 DECADE ROSARY with PENDANT
Standard 'Dominican Rosary' instructions may be adjusted as needed for 'Anglican Rosaries' or '10 bead Chaplets.' Dominican Rosary: 5 sets of 10 beads divided by 4 larger beads in circle. Attached at each end by using 2 top rings of rosary center. Pendant includes 3 Ave beads and 2 Pater beads (See below)

+
 5 BEAD PENDANT CONFIGURATION
Not:  2  large Pater beads, one at each end of 3 smaller Ave beads attached to lower ring of rosary center and ending in a crucifix All 4 connecting areas where wire is attached to either the center or cross are the same and design is created through repetition by using functional 'connecting' beads. (Large holed beads for wire to pass through twice.)
SUPPLIES

*STRUNG ROSARIES*

INSTRUCTIONS - STRINGING THE BEADS
BEFORE BEGINNING, PLEASE READ ALL INSTRUCTIONS

To save on wire do not cut the needed length of wire from spool. Simply begin stringing beads onto the wire while it is still attached to the spool. This also holds the beads on the wire while you are working.

BEADING SUPPLIES

53 ? AVE'S >  53 - 8 mm beads
6 ? PATERS >  10 - 12 mm beads
SEED BEADS - Tube  for spacers
VARIETY OF 4 to 5 mm beads for connecting and ornamental use (holes on 4 to 5 mm beads must be large enough for wire to go through twice.  If the second wire is forced it may cause the wire to curl  -  BEAD CAPS - optional for Paters and/or Aves - (2 for each bead.)


ROSARY CRUCIFIX
ROSARY CENTER
TOOLS

.019 SOFTFLEX WIRE
(30 foot spool of bronze or sterling  - 49 strand wire) 
2mm CRIMPING BEADS
(black ox, silver or gold colored)

*GOOD* 
CRIMPING PLIERS
*SHARP*
SIDE CUTTERS
 
~ A ~
HOW TO CRIMP
Instructions below are from the back of the Crimping Pliers. Technique will remain the same, adapt to your needs. (We normally use two beads at each end for extra strenght)
+
CONSTRUCTION NOTE
We would encourage you to practice crimping beads before you start.  To practice, cut a 6 in length of wire and double it, thread on several crimps and begin the crimping process.  (see how to crimp above) It will be important to practice on 2 wires, not 1!
For strength, you will want to use 2 crimping beads at each juncture before adding center or cross. Begin by adding starter beads as in image left to right:
TO END: draw wire through 1 crimp - 1 bead - 1 crimp - 1 bead. Loop wire through ring on center or crucifix then return through the same beads: 1 bead - 1 crimp - 1 bead - 1 crimp - 1 bead. Adjust length of loop as needed and crimp. (Make sure  all loops are the same size.)
 ~ B ~
DECADE of 10 AVE BEADS
Now that you are ready to begin your first decade, you will need to put spacers between each AVE bead of decade. Try 2 or 3 seed beads between each 8mm AVE bead to see which works best for your praying fingers. (Go back and look at first image, noting you will begin your design by counting from the top ring of the center medal.) Continue this sequence until you have completed your first decade of 10, ending with an AVE bead. Now you will be adding your first PATER bead.
 1  ? AVE > bead - 2 or 3 seeds - 1 ? AVE > bead - 2 or 3 seeds - 1 ? AVE >, etc. 
 ~ C ~
ADDING PATER BEAD
 You will need to create a larger space between last AVE bead and PATER bead by adding more seeds and other decorative beads of your choice. (eg: same beads used next to crimpers may work well - metal caps, etc) Once completed you are ready to start your next decade of 10 AVES.
  4 - 5 seeds - decorative beads - optional caps  ? PATER BEAD >  optional caps - decorative beads - 4 - 5 seeds
 ~ D ~
REPEAT SEQUENCE
Repeat sequence until you have completed 5 decades separated by 4 PATER
beads ( you will end with an AVE bead, not a PATER bead)
DESIGN NOTE
At the end of the 5th Decade, repeat A adding two more crimping beads.
 repeat B:  ? AVE >  4 times  ?  repeat C:  ? PATER >  3 more times 
 ~ E ~
TO ADD CENTER
 1. Using one of the two top rings of the rosary center, (allowing the
lower ring for the pendant) thread about 2 1/2  inches of wire through
ring and back through 2 crimps and first 2 beads. 2.  Adjust so wire loop is 5 mm or less. Make sure all loops are all the same size.
 ~ F ~
TO FORM CRIMPING BEAD
 Go back to A instructions above to review how to use crimping pliers. Technique will remain the same, adapt to your needs.
CONSTRUCTION NOTE
Make sure wire that is looped through the center, 'ender' beads and crimping beads is positioned parallel to itself.  If it cross over itself it may cause the rosary to twist at the last minute - then begin crimping:
+
To form a tight, clean and well shaped crimped bead you will need crimping pliers. Check images above noting difference in shape of the two areas for crimping. (For proper crimping - make sure you hold the pliers so curve points towards you and not away)
+
 1. Set crimp into inside 'crimper' - crimp bead into a 'c' shape to tighten and secure both wires.
 2. Set crimp in outside 'folder or rounder' - to fold and flatten bead back onto itself.
 3.  In same hole, turn bead 1/4 turn - crimp lightly but firmly again to round bead off.
(never work your pliars too hard as the crimp may cut through the wire causing it to break later) It becomes the weakest spot on the rosary if not careful.
 ~ G ~
TO COMPLETE LOOP
+
CONSTRUCTION NOTE
Hold rosary so center hangs down and spool is on top to release and let beads 'settle' on wire.   Make sure beads are not caught on wire creating empty spaces by running fingers down the beads several times. This also helps release any twisting of the wire. Cut wire off of spool about 3 inches beyond beads.  Repeat E using other top ring and making sure your wire connecting loops are all the same size before crimping.
 ~ H ~
TO COMPLETE PENDANT WITH CRUCIFIX,
USE TECHNIQUES and IMAGES ABOVE.
+
DESIGN NOTE
note that the 4 'ender' bead configurations are the same. The purpose of this is to create the same design on each end as 3 connect to the center and 1 connects the crucifix.
+
CONSTRUCTION NOTE
Before crimping pendant to center , check to make sure center and crucifix are facing in the same direction. Make sure your wire is parallel to itself as crimping overlapping wires may cause the metals to twist at the last minute.

SAMPLE ROSARY NOT FOR SALE
Thank you for asking but we only found enough blue antique beads to make one rosary (shown) and unable to find any more. this rosary is in a private collection and is not for sale. Pater beads are by Klew Expressions (Karen Lewis, California Bead Artist))


*CHAIN  ROSARIES*

INSTRUCTIONS - MAKING THE CHAIN
under construction
BEADING SUPPLIES

53 ? AVE'S >  53 - 8 mm beads
6 ? PATERS >  10 - 12 mm beads
METAL BEAD CAPS  -  (optional - two for each bead)

ROSARY CRUCIFIX
ROSARY CENTER

# gauge wire for making chain. (Silver or gold color, Bronze or sterling)

TOOLS

*GOOD* 
ROSARY PLIERS
*SHARP*
SIDE CUTTERS
 

*KNOTTED CORD ROSARIES*

link to knotted cord and ranger rosaries

... I am not Catholic but ...
I was the first Army Chaplain to carry the Ranger Rosaries. I am in the National Guard unit with Frank Ristaino and he and his family made them for those of us who were deploying to Bosnia. We arrived in Bosnia 18 SEP 2001 and returned 02 APR 2002. I am not Catholic but hold your faith and traditions in high regard. I still carry a Ranger Rosary with me everywhere I go and the only time I am without one is when I find a Catholic Soldier or family of a soldier who needs a word of encouragement.
+
Thank you for considering these rosaries as worthy of your web-site.
+
CH (MAJ) W. Ray Williams 1/158th US Cavalry Maryland Army National Guard
(Submitted at: 8:15 on Monday, July 28, 2003)

... always been devoted to the rosary ...
Hi:  I have always been devoted to the Rosary, but just as of late did I start making them.  I have seen probably 100 sites or better of bead sites and though many are beautiful, none compare to your's. So many beautiful pieces you carry.  Thank you for posting the instructions... I have gotten many tips from them.   Keep up the wonderful work that you are doing in finding such beautiful pieces to use  .....   Your ready made Rosary are just out of this world, what beautiful, exquisite work.  God Bless, Sincerely, Coco O'Connor


*MAGAZINE ARTICLE*

sorry, this issue is now sold out

We thank Belle Armoire Magazine (published by Somerset Studios) for including us in their Winter 2003 issue which is now sold out. For more wonderful craft ideas from Somerset, please visit your local book store. 
Spiritual Art
by Margot Carter-Blair

Combining your favorite beads with a centuries-old design, learn to fashion beautiful rosaries and chaplets that will be treasured for generations.

ROSARY WORKSHOP
MISSION STATEMENT
Our vision is to provide the finest handmade rosaries, chaplets and other fine religious art forms for personal worship we can make using the finest supplies available.  The Guild believes the work of our hands should give visual Glory to God, therefore for us, the best for you is very, very important.
+++
QUESTIONS? ask us:
copy and paste now
beadsong@hotmail.com
OR CALL WEEKDAYS - 9 to 5 central 
877.695.3561

SHOPPING LINKS

 MUSEUM  -  HISTORY   -   PRAYER
STUDY   -   SERVICE   -   COMMUNITY
 PRAY THE ONLINE ROSARY NOW
or to return to the page you were on, 
please use your back button
TOP OF PAGE

OFFICE HOURS
877 695 3561 -  9a - 5p central)
WEEK DAYS - MT- TF - (closed wednesdays) 
Shopping cart - Email (24/7)
beadsong@hotmail.com

MORE ORDERING INFORMATION
secure-online - credit card -[or]-   mail in - mo/personal check


Learn more about Our Lady of Guadalupe